Microsoft Teams, as part of the Microsoft 365 (M365) service, follows all the security best practices and procedures as seen in the Microsoft Trust Center. Though teams is designed and developed in compliance with the Microsoft security standard, users can further configure their “Meeting options” to make a teams meeting more secure.
1. Configure "Who can bypass the lobby?"
Recommended setting is “Only me”.
By default, people outside your organization need to wait at the lobby.
Remarks: Under the CUHK setting, all staff belong to one organization (called staff tenant) while all students belong to another organization (called student tenant). That means, if the teams meeting is held in staff tenant, all students will be regarded as external users. By default, they need to wait at the lobby.
People in my organization
Staff tenant
Staff, project accounts, etc
Student tenant
Students, Alumni, project accounts, etc
Meeting organizer can change the configuration according to your need. The available options are:
Who can bypass the lobby?
What happens
Recommended when…
Only me
As the meeting organizer, only you can get into your meeting directly. Everyone else will wait in the lobby.
You want everyone else to wait in the lobby until you’re ready to admit them.
People in my organization and guests
Only people in your org and guests (including those who have different email domains than yours) can get into your meetings directly.
You want all external people (anyone outside your org) to wait in the lobby so you can approve them one by one.
People in my organization and trusted organizations, and guests
Only people in your Teams org, external participants from trusted organizations, and guests can get into your meetings directly.
You want some external people to wait in the lobby so you can approve them one by one.
Everyone
Anyone who has access to the meeting link gets into the meeting directly, including people who call in.
You don’t want anyone to wait in the lobby. You want everyone to be able to join your meetings without specific approval.
By default, only the organizer can share screen, manage the lobby and do recording, etc. If more users need the right, organizers can change the meeting options before/during the meeting. During the meeting, organizers can change any participant to presenter at any time. Screen captures can be found under “4. Where to find Meeting Options?”. Below is a list of what organizer/presenter/attendee can do:
Capability
Organizer
Presenter
Attendee
Speak and share video
√
√
√
Participate in meeting chat
√
√
√
Share content
√
√
Privately view a PowerPoint file shared by someone else
√
√
√
Take control of someone else’s PowerPoint presentation
√
√
Mute other participants
√
√
Remove participants
√
√
Admit people from the lobby
√
√
Change the roles of other participants
√
√
Start or stop recording
√
√
Download participants’ list
√
Manage Meeting Options
√
The available options are:
Who can present?
What happens
Everyone
Anyone who has access to the meeting link will join the meeting as a presenter.
People in my organization
Only people in your org will be presenters. External participants will join as attendees.
Specific people
Only people you choose from the list of invitees will be presenters. Everyone else will join as attendees.
Only me
Only the organizer will be a presenter. All other participants will join as attendees.
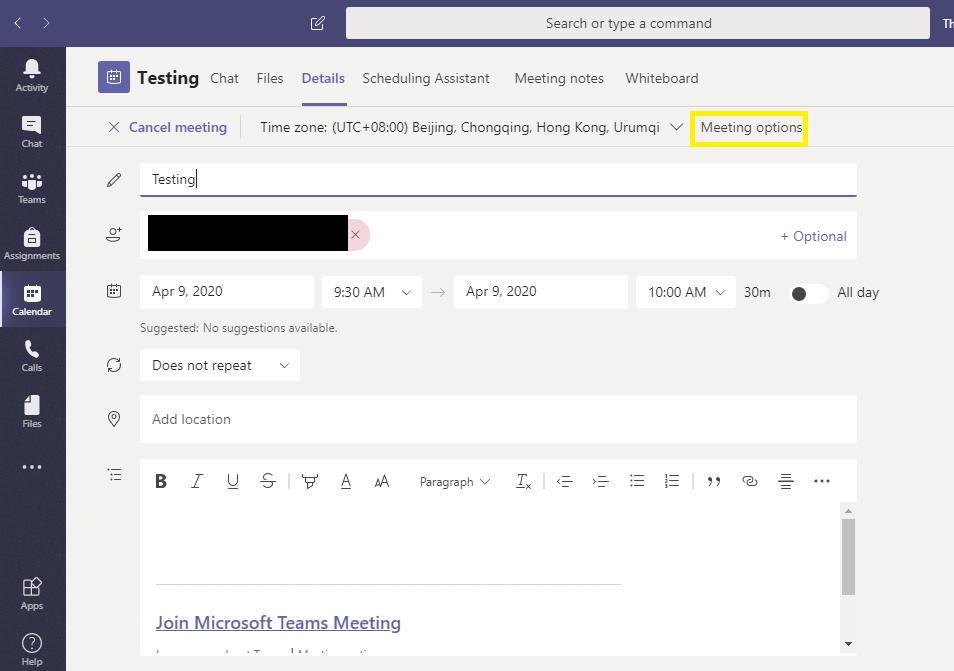
(a) After you’ve sent out the meeting invitation, you can click the “Calendar” icon and click your meeting.
Then you can find the “Meeting options”.
(b) You can also find the “Meeting options” link in your meeting invitation.
You can configure your meeting options in this page:
During the meeting, you can still configure the meeting options. For “Who can present?”, you can also use the following button in the Participants list.
Click here for more about Teams Security Guide from Microsoft.